|
by Dave The installation of this boost guage was relatively simple as soon as i found out how to route the vacuum line from the engine compartment to the driver seat. The kit from Extreme Motorsports came with about 5 feet of vacuum line, 5 feet of electrical wire, 4 zip ties, two clip connectors, one o-type connector and a vampire-type wire taps.
The vacuum line was just long enough while the wire was far too long. I ran the vacuum line from the nipple on the turbo for the time being. I'm very interested in what the turbo is actually putting out at this time, rather than what is getting to the port on the manifold. When i start manipulating the boost and using an intercooler i'll be much more concerned about what's getting to the engine.
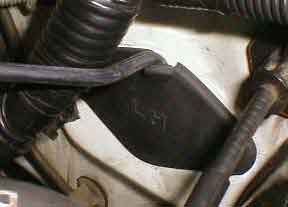
I ran the line over the manifold and to the diamond shaped plug in the firewall. I cut out a small notch in the seal and made a few cuts in the top so it would seal without a cut.
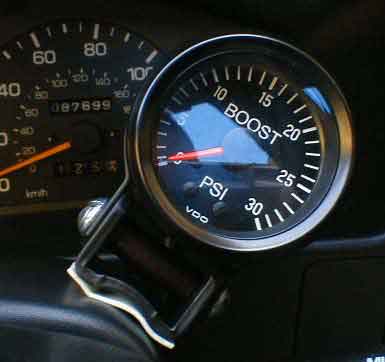
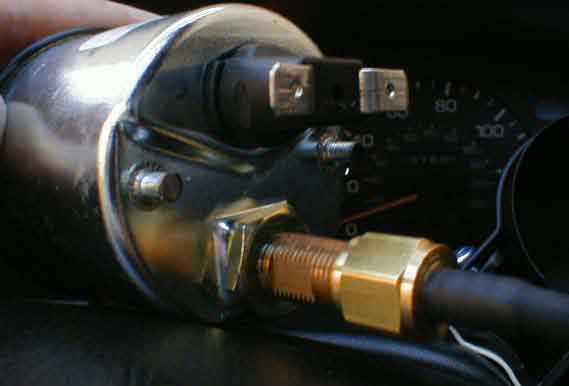
I then ran it up the steering column and over to the top to the gauge itself. For the electrical setup, which is only required if you want the backlight, i grounded one end to a bolt close to the fusebox and punched the other end into the cigarette lighter fuse. Since i'll probably never use them together i'm sure i'm OK. This gauge reads 0-30 positive pressure. There are others available with negative vacuume values. While a normally aspirated motor and a turbo outside of boost have a vacuum in the manifold during regular operation, a force-fed motor has a positive pressure as the compressor pushes air into the engine. A boost gauge should have been standard on the Turbos, but in retrospect i'm not sure where they would have put it. It's a must for any Turbo owner. In searching for a gauge pod i soon realized that an A-pillar mount wasn't likely to be available. I did find one from Autometer that fit the Legacy but it was only for a RHD 95+ version. I asked around and found that Autometer had a few options, most specifically a single adjustable mounted pod that could really be stuck anywhere. The part #2204 looked the best, as it is a black adjustable pod that fits both the 2 and 2 1/16 meters. Summit has the Black 2204 version for $12.95 and the Chromed 2203 for $20. The kit comes with the pod, a bracket that goes around the pod to secure it, a baseplate, two screws and a shunt to attack the pod to the baseplate and two adapters (one extension and one elbow). The first problem i had was clearance with my gauge. The guage has two threaded posts that go straight back from the back. These will need to be trimmed substantially in order to fit inside. The electrical connectors at the back are also too long so you'll need to use a pair of pliers of dikes to ben the connectors 90 degrees outward. The wires will then need to be soldered on instead of using the supplied connectors.
Instead of soldering i twisted the wire ends and ran them through the front of the hols on the connectors. I then twisted them around them and used electrical tape to keep the wires from grounding out. The ground i originally used didn't stay connected so i looked around for a better connection and found one right by the fusebox. It already had a wire grounded to it, possibly from the Amp, but it would work just fine.
With a rear opening and the elbow adapter, you have a wide array of mounting and routing options. At this moment mine is using the vdo supplied adapter straight back but would benefit from the elbow due to slight interference with the dash. Mounting the gauge on the steering column as i have it gives great visibility while not blocking very much. I miss the speed over 110mpg and part of the fuel gauge. The odometer and trip meter are still visible. Overall i'm very pleased with the gauge and the input it gives me. It does give off a little noise, as it's connected to the turbo and acts as a conduit for the sound, but it's barely noticeable. I'd also recommend getting the Autometer guage and pod instead of having to modify the vdo to fit. |


