|
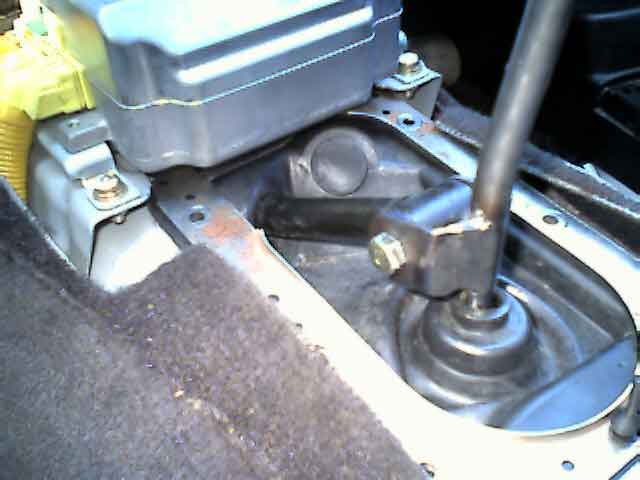
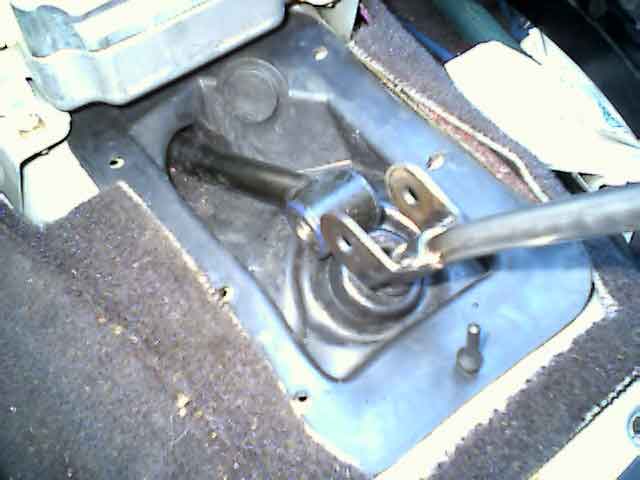
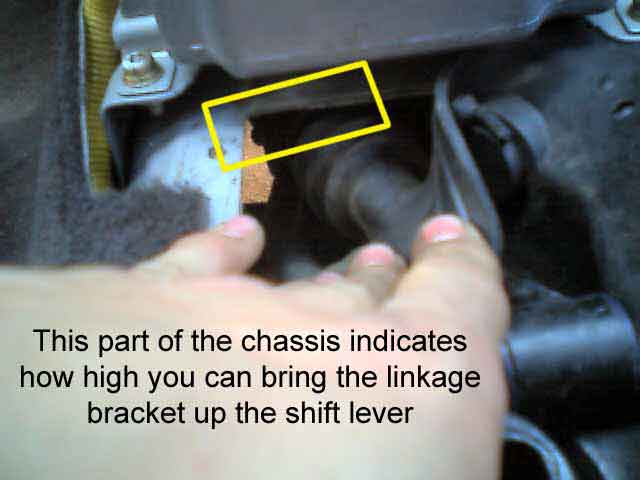
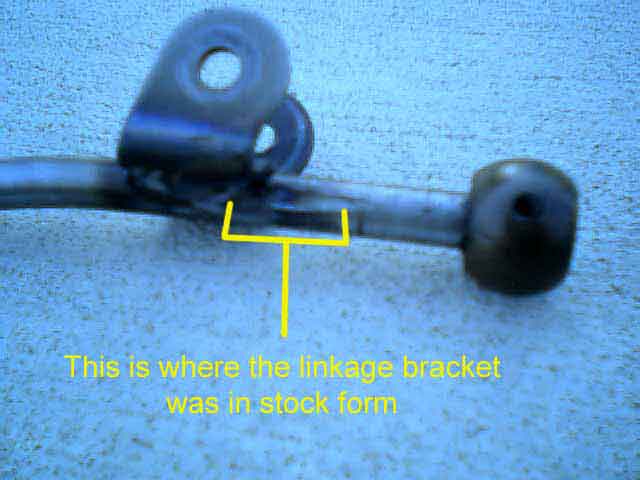
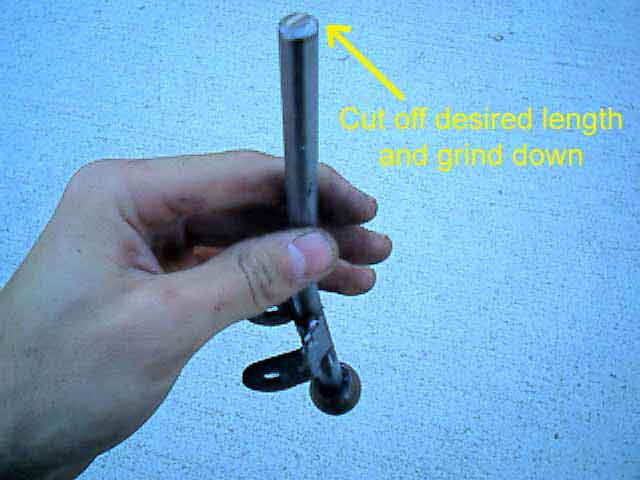
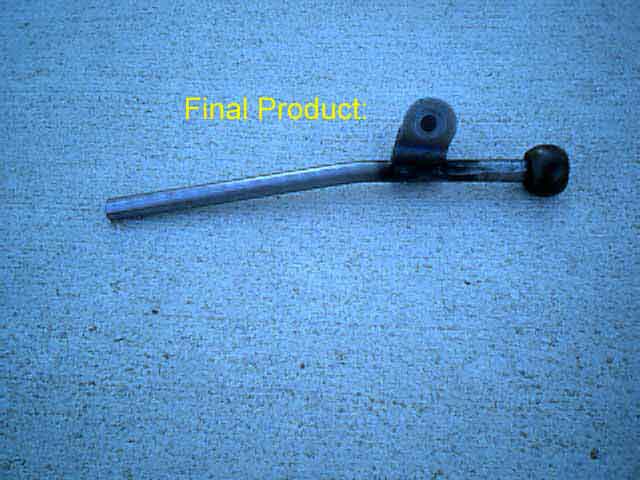
DIY Short Shifter by Mike Yach There are a few exceptions, but this is what I did. After driving my friends RS, and looking over Dave's Sti shift kit, I realized I needed something done to the long-ass throw of my shift lever. However, I wasn't willing to spend the $200+ USD for the Sti kit, and maybe would've sprung for a $100 kartboy if it would work, but Dave answered that for us a while ago in the Library. So, like always, I had to get my dirty little fingers in there and see what I could do to make a budget short shift. The two things I noticed that make a short-throw shift lever was the repositioning of the fulcrum (where the linkage attaches) and an actual reduction in height of the throw arm. Therefore, your hand will travel a much smaller distance when you shift. It's like using the boot to shift instead of the knob. Anyway, here's how it goes: What you'll need: 1. a welder. So this is not your DIY for everybody, but even if you took it to someone and paid to get it done, it'd be less than $200. 2. Some way to cut metal. I had access to a metal shop, so I used an angle grinder and a metal chop saw. If all you have is a dremel tool, that will work too, it just might take longer, no matter. 3. Depending on how much you shorten it, you might need a new shift knob. This whole project was inspired by the fact that I got a MOMO Raceairleather aluminum shift knob and leather boot. The MOMO knobs don't need the threads to be secured to the lever, so that's about where I chopped mine off. However, using the stock knob, I was still able to screw it on very solidly, despite the fact that there were no threads left on the lever. 4. The right shift lever. Hmmmmm? What? Well, looking at Dave's shifter in the Library, mine looks nothing like that. My shift lever is more or less a single rod that never changes diameter all of the way down to the nylon ball, has a slight bend back (toward the rear of the car), and has the bracket that connects to the linkage welded onto it. I am keeping in mind that Dave did the 4EAT to 5MT swap, and I don't know where his parts came from. I have a '93 USDM Legacy Turbo. Here's how to do it: 1. First, get
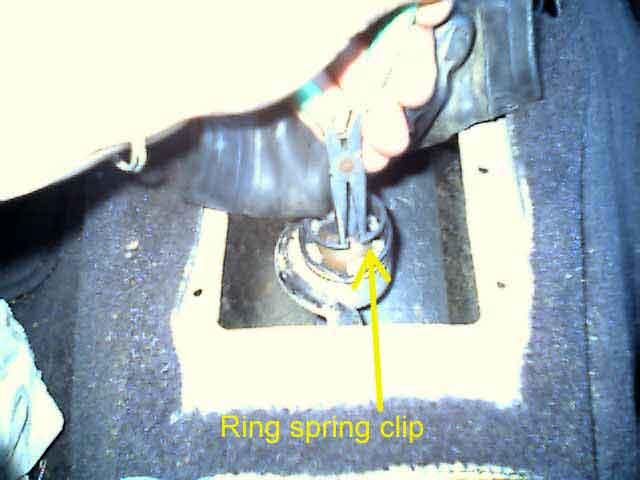
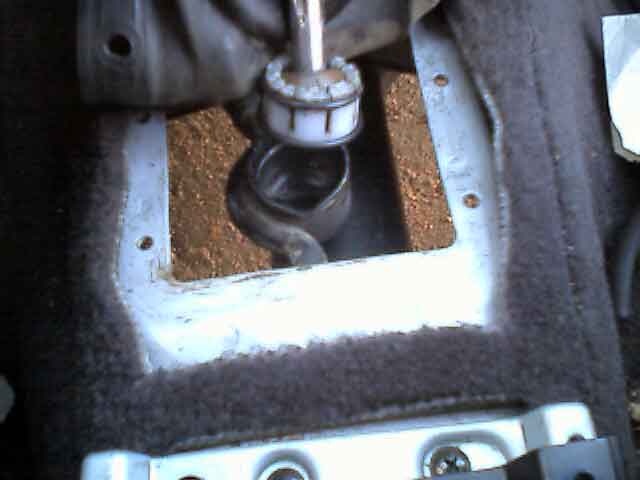
the boot off. Pretty basic interior dismantling. Cake.
Conclusion: Holy crap, I can't
believe how good this turned out! The feel of the car has transformed
almost completely with such a simple mod. The shifts are a hell of a lot
shorter, feels stiffer, much more notchy, and best yet, it's free! It
does require more effort to shift, but that's the very simple physics
of a lever, the closer you are to the fulcrum, the harder it is to move
the load. No rocket science here. Bottom line = It feels great, and I
HIGHLY recommend it. |