|
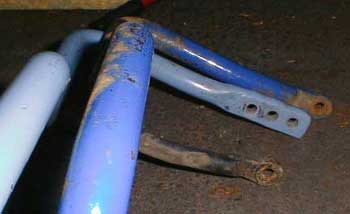
MRT Rear swaybar and Endlink install By Dave If you've read my other article on replacing the front endlinks, you know how much of a difference those made. While i didn't expect or receive as much of a difference after replacing the rear links, i did upgrade to the urethane Whiteline versions in preparation for a larger rear bar. I did originally plan to have Modern Garage install both the links and the rear bar, i was embarrased to find that the rear Impreza bar does NOT fit my Legacy. So the links went in, but with the stock 18mm rear bar still in tow. I'd purchased a used CUSCO 21mm rear bar from Chris at TRi Tuning but also came upon a really nice deal for an adjustable 18-22mm MRT bar from my friend Dave Benson. He'd accidentally been sent a Legacy bar instead of an Impreza one. The bars are interchangeable between the two cars, but the Legacy bar has a much more exagerrated dip to clear the spare tire cavity, and a slightly higher hump to clear the exhaust . It fit his RS just fine, but it was visible from behind the car and hung WAY down. He was sent the proper bar by MRT and they told him to keep the Legacy bar. I was lucky enough to have the only Legacy around and so i got it for a song.
Replacing the rear links and bar are quite easy. The rear bar is usually the last thing installed on the car so nothing else needs to be removed in order to gain access to it and remove and replace it. A few tools, a floorjack and something sturdy to put under the tires is all that's necessary.
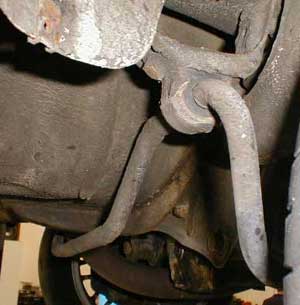
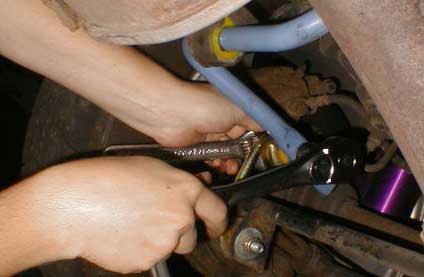
First, jack the back of the car up. To ensure proper safety i recommend setting the handbrake, putting the car in gear and putting blocks in front of the front tires to prevent any movement. Jack the car up high enough so that something sturdy, such as cinder blocks or wood blocks, can be put under the rear wheels. In order to properly install the bar, the weight of the car needs to be on the wheels. Loosen the jack and let it settle. Give the car a little movement and make sure everything is stable, you'll probably be wrenching hard. Loosen and remove the top and bottom bolts holding the endlinks to the swaybar and control arm. Remove the old endlink. Loosen and remove the botls holding the swaybar to the body mounts and remove the bar. Remove the metal fastener from the bar bushing, you'll be using this with the new bar and bushings. Install the new endlinks, bottom first, and tighten just enough so that you can still rotate them. There should be a package of black grease that came with the new bar, get some and rub it inside of the bushings. This will keep the bar from rubbing against the bushings and causing noise or binding. Put the bushings on the bar and then put the metal fastener back on it.
Now feed the bar back over the exhaust and attach the bar at both ends without tightening it too much. The farther out on the bar you attach it, the smaller the bar gets. The settings are 18, 20 and 22mm from the farthest hole inwards. This also holds true for the larger adjustable bars. Now comes the really tricky part. Reinstalling the bar to the body will probably be easy on one side, but the other will be a pain. Install one side and get it threaded good and then install the other side. This will make it easy to put both on. From this point, just tighten everything up good. I still don't have a torque wrench, but with enough muscle, i'm sure everything is in there fine.
|


