|
D2 Coilover Install By Dave Clements (4/13/01)
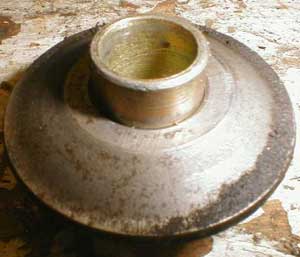
On Saturday the 21st of April, i decided that i needed to take the rear assembly apart again and somehow figure out the best way to put ti together. I came to the conclusion that for my car, there is no right way with the parts provided. This might be different for newer Legacies and Imprezas. Although previous attempts to eliminate the springiness in the setup had good results, i was still having a fair amount, especially after raising the fronts 1/2 inch to get the camber back in to line. Raising the front up seemed to bring back some of the bounciness i was experiencing before, and through deduction, and based on the pictures i'd taken during the install, i'd come to the conclusion that i'd not assembled the rear correctly. My first mistake was preloading the springs. I still had a tiny bit in the rear and never got around to dialing it out. Since i was removing everything, this would be very easy. I had to take the whole assembly apart to get a better look. I removed everything and took the whole assembly apart. What i'd noticed before is that the top had wasn't making contact with the top inside of the top mount. Instead, it was contacting it further towards the outside edge, where it wasn't supposed to. This i deemed my first problem. The brass-colored bearing was on top, where it was supposed to be, but all it was doing was keeping the top mount stable and not making any contact with the hat in any way. I knew this wasn't correct, but i seemed to be missing parts. Perhaps the older rear mounts are more concave than later models, but in my case, the hat couldn't touch the top inside. I attempted to put in a washer, then two, to bridge the gap from bearing to had, but i came to the conclusion that the bearing wasn't meant to take that much vertical load, especially on that part of it. I was at a loss as to what i could do to make it work. Maybe i needed new top mounts, perhaps i was missing more parts or maybe i should send the whole mess back. I thought about it, but i'd put enough effort in to it and i really wanted to make it work. My brother is an auto enthusiast as well, although his tastes are almost polar opposite of mine. He has a lifted Explorer and is building a rock-crawling Samurai for the fun of it. He's always in the garage tearing things apart and leaving stuff lying around. This time he left exactly the right parts lying around. I was trying to figure out what to do when i found a washer. It wasn't a typical washer, as it was convex on one side and flat on the other. I checked it out, and to my suprise, the small part of the bearing fit absolutely perfect into the washer. I was close, i could feel it. I searched around and finally found a match to it. I had something going now!
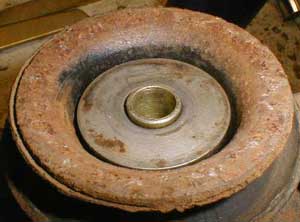
I set it up as a test, with the bearing on top and the washer on the bottom. it was perfrect, almost. The bearing poked out a little bit, just enough that it wouldn't let the washer sit flat against another one below it. This was a minot problem, this is what grinders are made for!
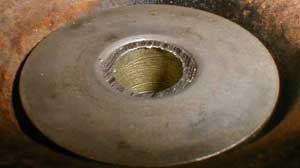
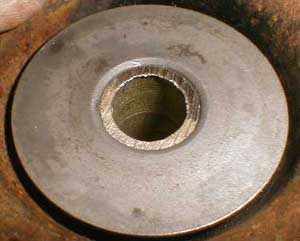
I used a die grinder and ground about 2mm from the small part of the bearing, just enough for it to sit right below the lip of the washer on the bottom. I then reassembled it, with another washer below, and it fit perfectly. The top mount no longer contacted the top hat!
|