|
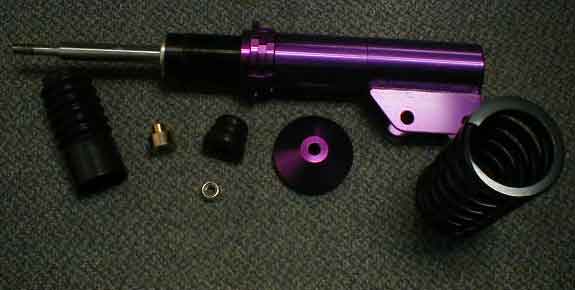
D2 Coilover Install By Dave Clements (4/13/01) (updates in italics) The first thing that struck me was the color of them and the lightness of the whole assembly. Chris had sent me pictures of them, but I had no idea that they would come as such. The color is a deep, light purple that's hard to describe. It's not paint, but the anodized aluminum. Very nice.
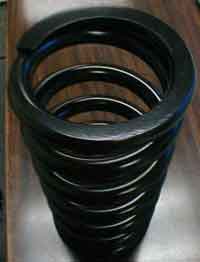
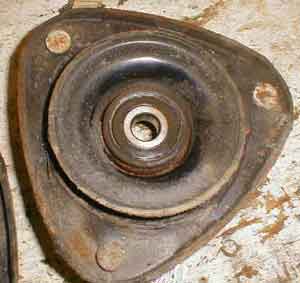
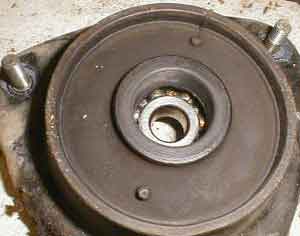
The main parts of the shock assembly are aluminum with the exception of the spring. This combines for a weight, without top mount, of around 10 pounds. Precise measuring aside, they're much lighter than the steel KYB GR2 units I had on. Less weight on the wheel, and less weight overall is a good thing. Note that there is no way to adjust the Camber on these coilovers. Apparently this is common. The only way to get proper camber is to use replacement top mounts with camber adjustment, otherwise known as camber plates. TRi can get CUSCO and their own branded versions. The entire assembly included a top nut, bearing, top hat, spring, dust boot, bump stop, spring perch, perch lock, bottom lock, bottom mount and the shock body. The only thing I needed from my old struts were the top mounts, which are old, dirty and rusty. Eventually I'll likely go for a set of STI or CUSCO hard mounts or even some camber-adjustable ones. They're usually more noisy however.
After a few anxious hours waiting to go home from work, I finally headed home for the last time on the setup I'd used for quite a while. I paid close attention to the turns and graphic amounts of body roll in the simplest of turns. I made a note to myself to take these same turns at the same speed in the new setup and note the difference. I've covered the better part of strut replacement with the GR2s in my other article, so if you have any general questions about removal, please consult that guide. Removal was a piece of cake since most of the effort to get everything apart was handled back when the GR2s were installed. A bit of muscle and the right wrenches persisted, and no WD-40 was necessary. I would recommend a breaker bar for many reasons, it's just a pain using a hollow tube over a ratchet. Struts removed, I still needed to get the top mounts off. This required me to disassemble the struts. Not having thought the whole process through entirely, I forgot to rent spring compressors. Rent spring compressors and don't go "ghetto" like me unless you've got a good vise. That said, be careful and use rope or something to keep parts from flying everywhere. I simply put two coils into the vise and compressed them till they were near letting go and released the top nut. Not much fanfare, but a bit of a pop off on both sides. Again, please rent spring compressors if you don't have a vise. Do not just take the thing apart, it is VERY dangerous.
|